Enabling Flexible Data Acquisition Across Mixed Vendor Compute Platforms
ADI DataX™ unifies application portability across heterogeneous
compute environments, enabling reusable workflows for data acquisition and
processing. Developers can scale complexity as needed, from rapid prototyping to
advanced system refinement. The solution highlights modularity, consistency, and
efficiency in building multi‑vendor data pipelines. This approach significantly
reduces integration overhead and accelerates product development.
This demo illustrates the flexibility of ADI DataX™ in enabling data acquisition
across mixed vendor compute platforms. The system integrates ADI’s data
acquisition hardware with a variety of compute platforms, including Zephyr RTOS
and no-OS. The demo showcases the seamless connectivity and data flow between
the hardware and software components, demonstrating how developers can easily
build and deploy data acquisition workflows across different environments. By
leveraging ADI DataX™, developers can focus on application development without
worrying about the complexities of integration, enabling faster time-to-market
for their products.
In this demo setup, the Raspberry Pi, running Kuiper 2, serves
as the central aggregation unit, communicating with the ADI hardware components
to acquire data using the AD-RPI-T1LPSE-SL via T1L
connections.
To demonstrate the flexibility of DataX™, the AD-APARD32690-SL
runs Zephyr RTOS, while the EVAL-ADIN1110 runs no-OS.
Both of the boards have an EVAL-CN0391-ARDZ connected to them,
which is used to read the temperature using 4 thermocouples each.
The system can be interchanged, by simply compiling the Zephyr application for
the EVAL-ADIN1110 and the no-OS application for the
AD-APARD32690-SL, demonstrating the ease of using
DataX™ in enabling data acquisition across mixed vendor compute platforms.
Required Hardware
Component
Role
Quantity
Notes
Raspberry Pi 4+
Running Kuiper 2 and Scopy 2 to connect to downstream devices.
1
AD-RPI-T1LPSE-SL
T1L capable board that can also power downstream devices.
1
It has a built in ADIN2111 which will communicate with the RPI using SPI.
AD-APARDPFW-SL
Power forwarding board with T1L capabilities.
1
It has a built in ADIN1110 which will send the packets to the AD-APARD32690-SL. It is also used to power a downstream device using daisy-chaining.
AD-APARD32690-SL Rev. E
Running Zephyr to communicate with the RPI and to calculate the temperature using data from the EVAL-CN0391-ARDZ.
1
It uses a MAX32690 microcontroller.
EVAL-ADIN1110
Running No-OS to communicate with the RPI and to calculate the temperature using data from the EVAL-CN0391-ARDZ.
1
It uses an STM32L4 microcontroller.
EVAL-CN0391-ARDZ
Read the voltage difference on the thermocouple probe.
This project builds an Industrial I/O Daemon (iiod) with network support on the
APARD32690 platform. It enables remote access to industrial I/O devices over the
network using the Libiio v.1.0 library run on Zephyr RTOS.
The monitored device here is an ad7124 which exposes 4 virtual channels for
reading the temperature from 4 different Type K thermocouples.
The data can be visualized using Scopy, which connects to the iiod running on the
APARD32690 board.
Setting Up the Zephyr Environment
In order to build the Zephyr application, you need to set up the Zephyr environment.
Please follow the instructions on Zephyr Getting Started Guide to do so.
Make sure to install all the required dependencies and initialize the Zephyr workspace before proceeding to the next steps.
Getting Libiio
Get the latest version of Libiio into the Zephyr project by updating west.yml.
Add the following lines under remotes:
Run this command to update the Zephyr project with the new manifest:
analog@analog:~/zephyrproject/zephyr$
westupdate
You should now have Libiio in the Zephyr project under modules/lib/libiio.
Build and Run
To further emphasize the way ADI DataX™ allows software to efortlessly accomodate
hardware changes, there are 2 possible setups for this Zephyr project. The only
software and hardware difference between the two is the inclusion or exclusion of the
AD-APARDPFW-SL shield from the build command and from the physical setup, as
explained below:
Both the AD-APARDPFW-SL shield and the EVAL-CN0391-ARDZ shield connected to the AD-APARD32690-SL board.
AD-APARDPFW-SL powers the AD-APARD32690-SL and establishes the ethernet connection over SPI0.
Build the application for this setup using the following command:
Only EVAL-CN0391-ARDZ shield connected to the AD-APARD32690-SL.
The AD-APARD32690-SL is externally powered through the USB and uses SPI4 to communicate via ethernet.
This flashing process requires the ADI distribution of OpenOCD to be installed. Details on how to
install it can be found on ADI OpenOCD GitHub.
If you have problems with the flashing process, please append the build command with
-DOPENOCD=<path_to_your_adi_openocd> and rebuild. You should see <path_to_your_adi_openocd>
in ./build/zephyr/runners.yaml, under config -> openocd.
By connecting to the serial communication of the board (e.g.: minicom-D/dev/ttyACM0-b115200)
and resetting the AD-APARD32690-SL board, the following output should be observed for each configuration:
This project builds an Industrial I/O Daemon (iiod) with network support on the
EVAL-ADIN1110 platform. It enables remote access to industrial I/O devices over the
network using the Libiio v.0.x library run on no-OS environment.
The monitored device here is an AD7124-8 which exposes 4
virtual channels for reading the temperature from 4 different Type K
thermocouples. The data can be visualized using Scopy, which connects to the
iiod running on the EVAL-ADIN1110 board.
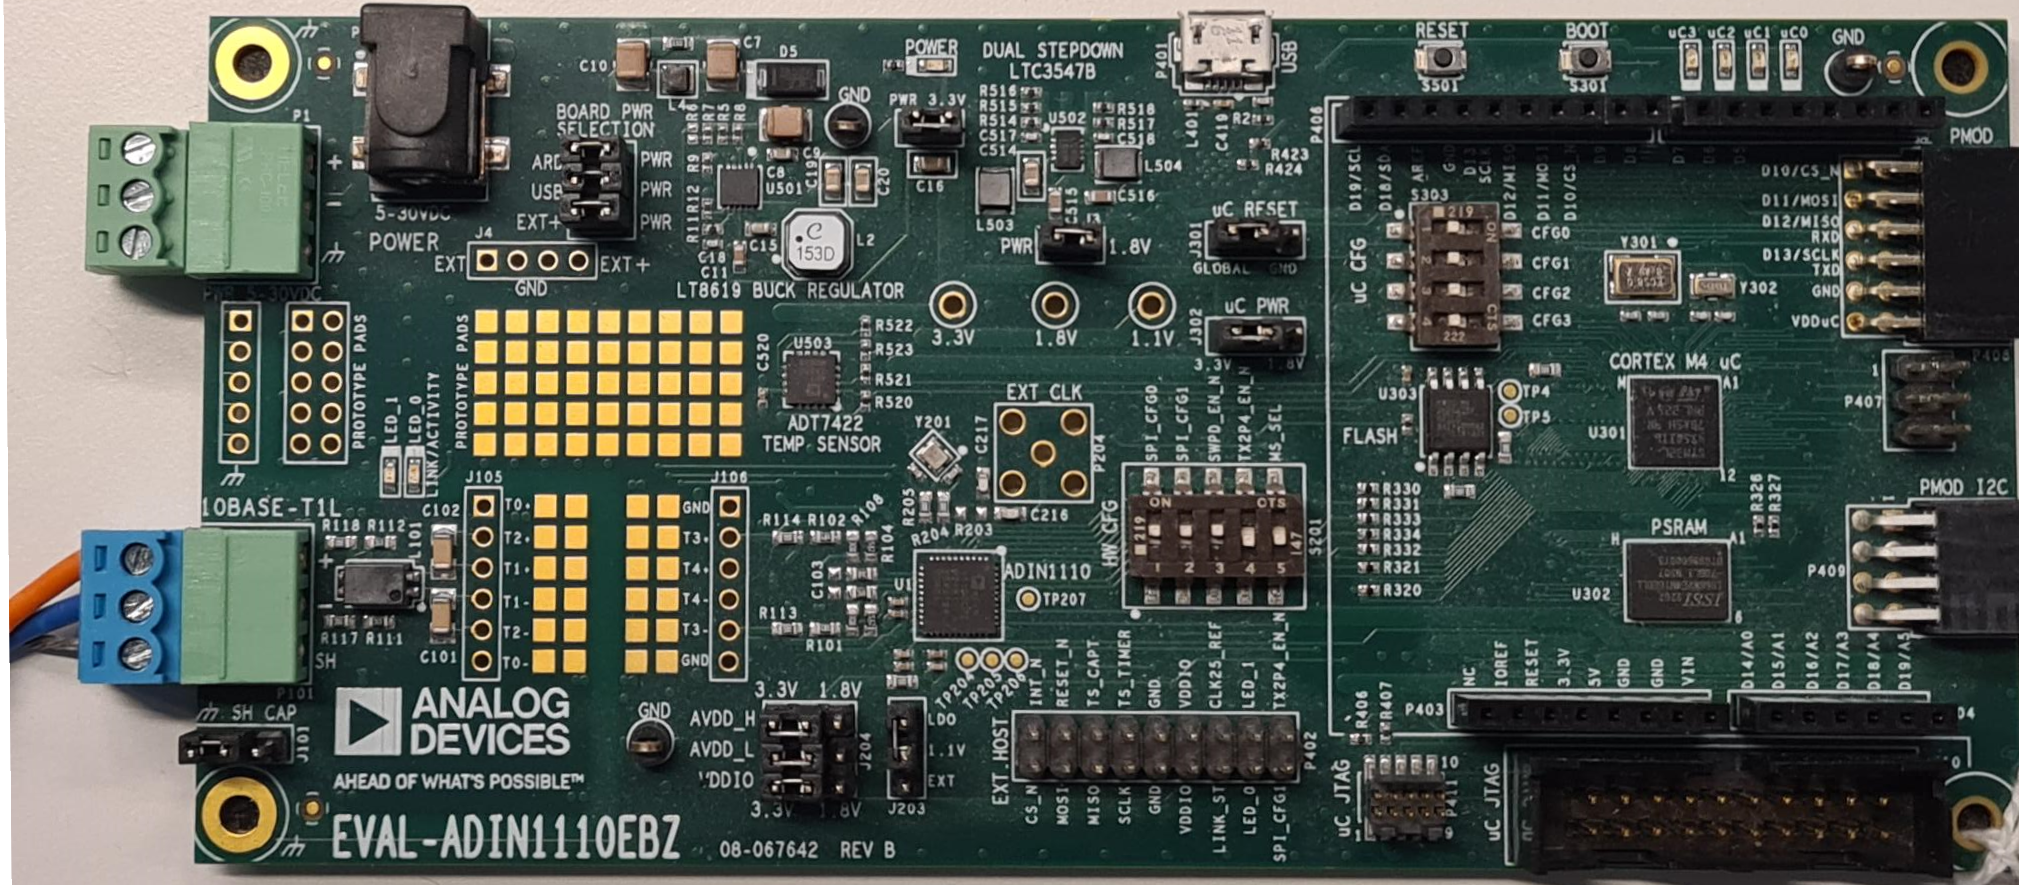
Hardware Configuration
Figure 2 EVAL-ADIN1110 hardware configuration
Note
The EVAL-CN0391-ARDZ can be powered only through the USB port of the EVAL-ADIN1110
board for this particular setup.
Setting Up the no-OS Environment
In order to build the no-OS application, you need to set up the no-OS environment.
Please follow the instructions on the no-OS Build Guide
to do so. Make sure to install all the required dependencies (GNU Make, ARM GCC
toolchain, and OpenOCD) before proceeding to the next steps.
Build and Run
After setting up the environment, build the application using the following command
from the no-OS root directory:
You are now ready to connect to the board using Scopy and start acquiring data from
the thermocouples. To do this, follow the steps below:
Open Scopy and enter the URI of the EVAL-ADIN1110 board (ip:192.168.90.60), then click Verify.
Click Add Device with both DataLogger and Debugger selected.
Then click Connect.
Go to the Data Logger tab, select the channels you want to display and then click Start to start acquiring data from the thermocouples.
Scopy
You are now ready to connect to the board using Scopy and start acquiring data from the thermocouples.
To do this, follow the steps below, also explained in the video:
Open Scopy and enter the URI of the APARD32690-SL board (ip:192.168.97.100), then click Verify.
Click Add Device with both DataLogger and Debugger selected.
Then click Connect.
Go to the Data Logger tab, select the channels you want to display and then click Start to start acquiring data from the thermocouples.
Figure 3 Connecting to the boards using Scopy.
Note
Use ip:192.168.97.100 for AD-APARD32690-SL or ip:192.168.90.60 for EVAL-ADIN1110EBZ.